
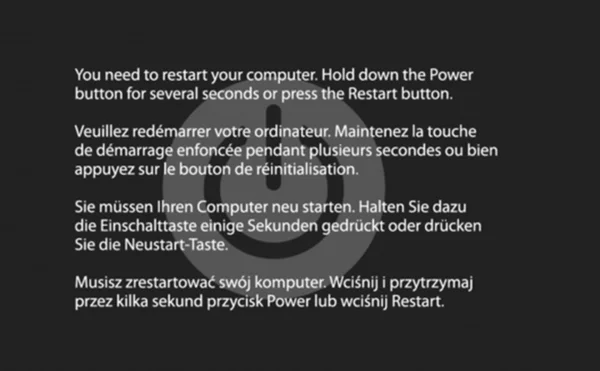
A Mac kernel panic on startup means macOS hit a critical error and had to restart. It is the Mac equivalent of a blue screen. When this happens, your screen goes dark and shows a warning message in multiple languages. During our hands-on lab testing on macOS Sonoma and Ventura, we saw this happen on both M-series Apple Silicon chips and older Intel chips. The main causes are damaged APFS file structures, old app extensions, or faulty USB accessories.
Quick Checks to Run First
Unplug All External Devices
Unplug every cable and accessory from your Mac. This includes docks, external drives, webcams, and keyboards. A damaged cable or a failing USB hub can send bad signals to your Mac while it tries to start up. If your Mac boots up normally without these items, plug them back in one by one to find the broken device.
Perform a Hard Power Cycle
When a Mac gets stuck in a restart loop, corrupted temporary data stays in the memory. Press and hold the power button or Touch ID sensor for ten seconds until the screen turns black and the fans stop. Leave the computer turned off for thirty seconds. This clears the memory completely before you turn it back on.
Method 1: Boot into macOS Recovery
If your Mac cannot load the main startup disk, you need to open macOS Recovery. This is a built-in repair tool that runs outside of normal macOS.
Steps for Apple Silicon (M1, M2, or M3 Macs)
Turn your Mac off completely. Press and hold the power button. Keep holding it even when the Apple logo appears. Release the button only when you see the text that says “Loading startup options.” Click the gear icon labeled “Options,” then click Continue. Enter your Mac admin password when asked.
Steps for Intel Macs
Turn your Mac off. Press the power button once, and right away press and hold the Command and R keys together. Keep holding both keys until you see the Apple logo and a loading bar. If your local recovery partition is broken, you will see a spinning globe instead. Connect to your Wi-Fi network and wait for the recovery tools to load from the internet.
Method 2: Repair the Drive with Disk Utility First Aid
Once the recovery screen opens, pick Disk Utility and click Continue. This tool finds and fixes directory damage on your storage drive.
Show All Storage Devices
By default, Disk Utility hides the main drive layout. Click the View menu in the top left corner of the window and select “Show All Devices.” The left sidebar will now show your main drive at the top, followed by the APFS Container, and then the volumes named Macintosh HD and Macintosh HD Data at the bottom.
Run First Aid from the Bottom Up
Always run First Aid in order from the bottom of the list to the top. Click on the lowest volume, usually named Macintosh HD Data, and click the First Aid button at the top of the window. Click Run. When it finishes with a green checkmark, run First Aid on Macintosh HD. Next, run it on the APFS Container. Finally, run it on the top-level disk name. Fixing the volumes from the bottom up ensures that all folders are repaired before the main partition map is verified.
Method 3: Check for Broken Apps in Safe Mode
If Disk Utility says your drive has no errors, a third-party app or system extension is causing the crash. Safe Mode stops all non-essential third-party drivers from loading during startup.
How to Start in Safe Mode
On an Apple Silicon Mac, turn the machine off, then hold the power button until you see the startup options screen. Click your main drive icon, hold the Shift key, and click “Continue in Safe Mode.” On an Intel Mac, turn on the computer and immediately hold the Shift key until the login screen appears. You will see the words “Safe Boot” in red text in the top right corner.
Remove Conflicting Software
If your Mac boots into Safe Mode without crashing, an installed app is the problem. Open your Applications folder and remove any old antivirus tools, VPNs, or cleaning apps that have not been updated recently. After deleting these apps, empty your Trash and restart your Mac normally.
Method 4: Reset NVRAM and SMC (Intel Macs Only)
Older Intel Macs store low-level hardware settings in special memory chips called NVRAM and SMC. Corrupted settings in these chips can cause early startup crashes. Apple Silicon Macs handle these checks automatically, so this step only applies to Intel models.
Reset the NVRAM
Turn your Mac off. Press the power button, then quickly press and hold Option, Command, P, and R together. Hold all four keys down for twenty seconds. Release the keys after you hear a second startup chime, or after the Apple logo appears and disappears a second time.
Reset the SMC
Turn your Mac off and disconnect the power cable. On the built-in keyboard, press and hold Control, Option, and Shift together for seven seconds. Keep holding them, and then press and hold the power button as well. Hold all four keys down together for another seven seconds, then let go. Plug the power cord back in and turn on the computer.
Advanced Fix: Erase the Drive and Reinstall macOS
If First Aid cannot repair the drive and Safe Mode still crashes, the operating system is too damaged to fix. You will need to erase the drive and install a clean copy of macOS.
Warning: Erasing your drive will permanently delete all your files, photos, and apps. Only proceed with this step if you have an external backup or accept that your data will be wiped.
Boot back into macOS Recovery and open Disk Utility. Make sure “Show All Devices” is selected. Click the top-level drive on the left sidebar. Click the Erase button at the top. Name the drive Macintosh HD, set the format to APFS, and choose GUID Partition Map. Click Erase. When the process finishes, close Disk Utility. On the main recovery menu, select “Reinstall macOS” and follow the on-screen steps.
Quick Reference Troubleshooting Matrix
| Problem | Best Solution | Data Loss Risk |
| Mac crashes when an external drive is plugged in | Unplug all external accessories | None |
| Mac crashes when running an old app | Boot into Safe Mode and uninstall the app | None |
| Mac crashes right after a system update | Run Disk Utility First Aid in Recovery | None |
| Intel Mac crashes before the Apple logo appears | Reset the NVRAM and SMC chips | None |
| First Aid fails and Safe Mode will not boot | Erase the drive and reinstall macOS | High (Erases all files) |
Frequently Asked Questions
What does a kernel panic log tell you?
A kernel panic log is an error report written the moment your system crashes. The top part of the log shows which processor core failed. Below that, it lists the exact software driver or app that caused the crash, helping you identify which third-party tool broke the system.
Is a kernel panic caused by hardware failure?
Usually not. Most kernel panics are caused by outdated apps, damaged system files, or bad updates. Physical hardware failures, like broken memory or damaged logic boards, can cause panics, but software issues are much more common.
What should I do if Disk Utility cannot fix my drive?
If First Aid fails, the file structure on the drive is too broken to repair automatically. Your only options are to back up any remaining files that you can access, erase the drive completely, or replace the internal drive if it has suffered physical damage.
Can I save my files if my Mac will not boot?
Yes, as long as the drive is not physically dead. Connect your broken Mac to another healthy Mac using a Thunderbolt cable. On Apple Silicon, go to Recovery Options, click Utilities, and select “Share Disk.” On an Intel Mac, hold the T key while turning it on to enter Target Disk Mode. The healthy Mac will show your internal drive on its desktop, letting you copy your files over before you erase the system.