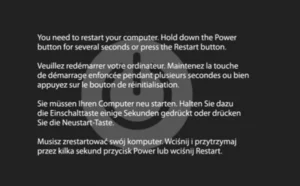
High CPU usage caused by internal Windows system processes can cripple your machine’s performance, leading to extreme overheating, severe input lag, and sudden crashes. Unlike third-party applications that can simply be uninstalled when they misbehave, system-level executables are deeply integrated into the operating system architecture. Attempting to forcefully terminate critical operations like the System process, Service Host, or Windows Management Instrumentation can trigger an immediate blue screen of death. Resolving these heavy loads requires carefully diagnosing the exact background service causing the bottleneck and repairing its underlying framework rather than attempting to forcefully close it.
Identify the Specific System Process Causing the Spike
Before applying any system-wide fixes, you must identify exactly which internal executable is commanding the processor’s attention. Press the Control, Shift, and Escape keys simultaneously on your keyboard to instantly launch the Windows Task Manager without navigating through the Start menu. If the window opens in a simplified view, click on the “More details” arrow located at the bottom left corner to reveal the full diagnostic interface.
Navigate to the Processes tab at the top of the window. Click on the column header labeled “CPU” to sort the list of active applications by their current processing demand. The small arrow next to the CPU label should point downwards, indicating that the most demanding processes are pinned at the top of the list. Pay close attention to the names of the processes consistently hovering above twenty percent utilization. The most common offenders are typically WMI Provider Host, System, Service Host (svchost.exe), Desktop Window Manager, and Microsoft Compatibility Telemetry. Note the exact name of the offending process to determine which of the following troubleshooting methods applies to your specific situation.
Method 1: Fix High CPU Usage from WMI Provider Host
The WMI Provider Host, known internally as WmiPrvSE.exe, is a critical Windows service that allows other applications on your machine to request and receive detailed information about your system’s current state. When this process consumes excessive CPU cycles, it is rarely the fault of the WMI service itself. Instead, another piece of software on your computer is constantly bombarding the WMI Provider Host with poorly coded information requests, causing it to overload the processor while attempting to answer them all.
To resolve this, you must restart the underlying service to clear its backlog of requests. Press the Windows Key and the letter R simultaneously to open the Run dialog box. Type “services.msc” into the text field and press Enter to launch the Services management console. Scroll down the extensive alphabetical list until you locate “Windows Management Instrumentation.”
Right-click on the Windows Management Instrumentation entry and select “Restart” from the context menu. If the restart option is greyed out, select “Stop” first, wait for the service status to clear, then right-click it again and select “Start.” Once the service restarts, return to the Task Manager to see if the CPU usage has dropped. If the issue returns immediately, a third-party application on your PC is actively malfunctioning and must be identified by booting into Safe Mode and uninstalling recently added software.
Method 2: Resolve System and Ntoskrnl.exe Issues
The generic “System” process in Task Manager represents the kernel of the Windows operating system, operating under the executable name ntoskrnl.exe. When the System process consistently draws heavy CPU power, the root cause is almost entirely hardware-related. The Windows kernel handles hardware interrupts, which are signals sent from your physical components like the motherboard, RAM, or graphics card requesting immediate attention from the processor. Defective hardware or corrupted peripheral drivers will flood the kernel with these interrupts, causing massive CPU spikes.
Begin by disconnecting all non-essential USB devices from your computer, including external hard drives, webcams, printers, and gaming controllers. If the System process CPU usage drops immediately after unplugging a specific device, you have found the hardware causing the interrupt loop. You must then navigate to the manufacturer’s official website for that specific device and download their latest official driver package.
If unplugging external devices does not resolve the kernel overload, the issue likely stems from outdated motherboard chipset drivers or a corrupted storage drive. Press the Windows Key and X simultaneously, then select Device Manager. Expand the “Display adapters” and “Disk drives” categories, right-click the components listed there, and select “Update driver” to ensure Windows has the latest communication protocols for your core hardware.
Method 3: Manage Windows Update and Svchost.exe
Service Host, displayed in Task Manager as svchost.exe, is a shared service process that serves as a shell for loading services from dynamic-link libraries. Windows groups multiple internal services under a single Service Host process to save memory. The most frequent cause of a massive Service Host CPU spike is a background Windows Update getting stuck in an endless download loop or failing to properly index a downloaded patch.
Open the modern Windows Settings application by pressing the Windows Key and the letter I. Navigate to the “Update & Security” section on Windows 10, or the “Windows Update” section on the left sidebar in Windows 11. Click on the button labeled “Pause updates for 7 days.” This immediately sends a kill command to the background update delivery optimization service.
Check your Task Manager; if the CPU usage drops back to normal, you have confirmed that a stuck update was the culprit. To fix the underlying update mechanism, navigate to the System category in Settings, select “Troubleshoot,” then select “Other troubleshooters.” Locate the Windows Update troubleshooter and click the “Run” button next to it. Allow the automated tool to clear your temporary update cache and restart the cryptographic services, which will allow you to safely resume updates without triggering another CPU overload.
Method 4: Repair Corrupted System Files Using SFC and DISM
If your high CPU usage is caused by processes like Microsoft Compatibility Telemetry or the Desktop Window Manager, the core system files governing these visual and reporting services may have become severely corrupted. Windows includes powerful built-in command-line tools designed specifically to verify the integrity of your operating system architecture and replace damaged files with fresh copies downloaded directly from Microsoft servers.
Click on the Windows Start Menu, type “Command Prompt” into the search bar, right-click the application icon, and select “Run as administrator.” You must have elevated privileges to modify system files. Inside the terminal window, type “DISM /Online /Cleanup-Image /RestoreHealth” and press Enter. The Deployment Image Servicing and Management tool will connect to the internet, scan your local system image for corruption, and repair the foundation of your operating system. This process can take up to thirty minutes and may appear to freeze at twenty percent; do not close the window.
Once the DISM command successfully completes, type “sfc /scannow” and press Enter. The System File Checker will scan all protected system files and automatically replace corrupted files with a cached copy that is located in a compressed folder. After the verification reaches one hundred percent and the terminal confirms that corrupted files were successfully repaired, restart your computer to finalize the system restoration.
Method 5: Adjust Windows Search Indexing
The Windows Search Indexer, running as SearchIndexer.exe, constantly scans your hard drive in the background to catalog your files, emails, and application paths so they appear instantly when you type in the Start menu. If your computer has a massive amount of fragmented files, or if the index database itself becomes corrupted, this process will relentlessly consume CPU power as it desperately attempts to rebuild its catalog.
Press the Windows Key and the letter R simultaneously, type “control.exe srchadmin.dll” into the Run dialog box, and press Enter to open the Indexing Options control panel. Click the “Advanced” button located at the bottom of the window. Under the Troubleshooting section in the middle of the new dialog box, click the button labeled “Rebuild.” Windows will warn you that rebuilding the index might take a long time to complete. Click OK to accept.
The indexer will delete its corrupted database and start fresh. While the CPU usage may briefly spike during the initial rebuild phase, it will settle down to a state of near-zero utilization once the new catalog is completed. If the search indexer continues to misbehave after a rebuild, you can permanently disable the service by opening the Services management console, locating “Windows Search,” right-clicking it, selecting Properties, and changing its startup type to “Disabled.”
Frequently Asked Questions
Why does my CPU usage spike to 100 percent when I first open Task Manager?
This is completely normal behavior. When you launch the Task Manager, the operating system must instantly poll every single active process, hardware sensor, and memory allocation across the entire system to generate the initial list you see on screen. This sudden, massive burst of information gathering causes a momentary CPU spike that typically resolves itself within two to three seconds after the application interface fully loads.
Can a failing hard drive cause high CPU usage in Windows?
Yes, a failing mechanical hard drive or a degrading solid-state drive can cause extreme CPU spikes, typically manifesting in the System process. When storage sectors go bad, the motherboard struggles to read data from the drive. The CPU gets trapped in a cycle of constantly requesting the data, failing to receive it, and requesting it again. This hardware-level communication failure keeps the processor under heavy load until the drive either successfully reads the data or completely fails.
Is it safe to end tasks like System or Service Host?
It is absolutely never safe to forcefully end the System process or a critical Service Host process via the Task Manager. The System process runs the core Windows kernel; ending it will immediately crash the entire operating system, resulting in a blue screen and potential data loss for any unsaved work. While ending a Service Host might not instantly crash the PC, it will sever critical background functions like your audio drivers, network connectivity, or firewall security until the system is rebooted.