Quick Diagnostics Checks to Run First
Before modifying deep system settings or altering network configurations, you must verify the physical state of the routing hardware. Walk over to your physical home router and examine the LED indicator lights located on the front panel. You are specifically looking for the light labeled WAN, Internet, or a generic globe icon. If this specific light is illuminated red, blinking orange, or completely unlit while the primary power and Wi-Fi lights remain green, your entire Internet Service Provider network is currently experiencing an outage. No amount of smartphone troubleshooting will resolve an upstream blackout from the utility pole.
You must also isolate the connection failure to determine if it is a system-wide crash or a device-specific glitch. Pick up a secondary device, such as a laptop, tablet, or another smartphone, and connect it to the exact same Wi-Fi network. If the secondary device successfully loads web pages while your primary Android device remains blocked, you have definitively isolated the problem to the software configuration on your primary smartphone. If all devices display the same no internet error, the router’s internal firmware has likely crashed and requires a hard reboot by unplugging the power cable from the wall for sixty seconds.
Finally, verify that you are not trapped behind a hidden captive portal authentication screen. Many public Wi-Fi networks, hotel routers, and even heavily managed apartment complex networks allow you to connect locally but block outbound internet traffic until you accept their terms of service on a hidden web page. Open your Google Chrome or standard mobile browser and attempt to navigate to a non-secure webpage, such as a plain HTTP site. This action will frequently force the router to intercept your browser request and instantly redirect you to the required login screen, immediately resolving the block once you click accept.
Method 1: Forget and Reconnect the Wi-Fi Network
When an Android device connects to a home router, it requests a temporary IP address lease from the router’s dynamic host configuration protocol server. If your smartphone disconnects and reconnects rapidly, or if the router’s assignment pool becomes corrupted, the router may assign an IP address that is already in use by another smart home device. This IP conflict allows local connection but strictly prohibits outbound internet routing to prevent data packet collisions. Forcing your Android device to completely forget the network deletes the corrupted lease and forces a clean handshake request from scratch.
On a device running Stock Android 14 or 15, such as a Google Pixel or Motorola smartphone, open the Settings application and tap on Network and internet. Select the Internet category at the top of the menu to view your active connections. Tap the small gear icon located directly to the right of your currently connected Wi-Fi network name. On the resulting network details screen, tap the prominent trash can icon labeled Forget. Once the network is purged from your saved list, tap the network name again in the discovery list and re-enter your password to negotiate a fresh IP assignment.
If you are operating a Samsung Galaxy device running One UI 6, the navigation path differs slightly due to Samsung’s customized settings architecture. Open the Settings application and tap on Connections. Select the Wi-Fi category, ensuring you tap the text itself rather than the toggle switch. Tap the gear icon adjacent to your problematic network, then look to the bottom right corner of the screen and tap the Forget icon. Wait ten seconds for the internal Wi-Fi radio to reset its cache, then tap the network again to reconnect.
For users running Xiaomi HyperOS or legacy MIUI, open the Settings application and navigate to the Wi-Fi menu. Tap the small right-facing arrow icon located next to your active network name to enter the advanced details page. Scroll to the absolute bottom of this page and select Forget network. Re-authenticate with your security credentials to force the router to issue a new, unconflicted internal IP address.
Method 2: Manually Configure Private DNS Settings
To implement this on modern Android architecture, you will utilize the system-wide Private DNS feature rather than changing settings on individual Wi-Fi networks. On a Stock Android or Google Pixel device, open the Settings application and tap on Network and internet. Scroll down to the bottom of this menu and select Private DNS. By default, this is set to Automatic. Change the selection to Private DNS provider hostname. In the text field that appears below, type exactly “dns.google” without the quotation marks to route your traffic through Google’s massively redundant public servers, or type “1dot1dot1dot1.cloudflare-dns.com” to utilize Cloudflare’s privacy-focused resolvers. Tap Save to instantly apply the new routing rules.
On a Samsung One UI device, open the Settings application and tap on Connections. Scroll to the bottom of the first page and tap on More connection settings. Select Private DNS from the top of the list. Choose the radio button labeled Private DNS provider hostname, enter “dns.google” into the configuration field, and tap Save. The Android operating system will immediately drop the corrupted ISP routing tables and force all web traffic through the newly assigned secure servers, instantly restoring web access across all applications.
Method 3: Disable MAC Address Randomization
Every network interface card in existence possesses a unique hardware identifier known as a Media Access Control address. Beginning with Android 10, the operating system defaults to generating a completely random, spoofed MAC address every single time it connects to a new Wi-Fi network. While this feature excellently prevents retail stores from tracking your physical movements across different locations, it creates massive compatibility conflicts with older home routers and strict enterprise firewalls. Many local networks utilize MAC filtering security, which actively blocks internet access for any device presenting an unrecognized or constantly changing hardware address, even if the user possesses the correct Wi-Fi password.
To resolve this conflict on a Stock Android device, open the Settings application, tap Network and internet, and select Internet. Tap the gear icon next to your currently connected home network. Scroll down and expand the Advanced dropdown menu. Locate the Privacy section, which will likely be set to Use randomized MAC. Tap this option and change it to Use device MAC. The Wi-Fi radio will briefly disconnect and immediately reconnect using the physical hardware address burned into the smartphone’s logic board, satisfying the router’s strict filtering rules.
On a Samsung One UI device, navigate to Settings, then Connections, then Wi-Fi. Tap the gear icon next to your network name, and then tap View More to expand the advanced configuration list. Locate the MAC address type setting. Tap it and switch the selection from Randomized MAC to Phone MAC. Because this setting is applied on a per-network basis, you will retain the privacy benefits of randomization when connecting to public coffee shop networks while ensuring stable, uninterrupted internet routing when connected to your private home hardware.
Method 4: Execute a Comprehensive Network Settings Reset
When manual DNS configurations, DHCP lease refreshes, and MAC address adjustments fail to restore external routing, the core networking framework within the Android kernel has become irreversibly corrupted. This frequently occurs immediately following a major over-the-air operating system update, where legacy cached network data severely conflicts with new routing protocols. The final software-level solution is a comprehensive network settings reset, which forcefully purges all wireless caches and rebuilds the radio communication architecture from a completely factory-fresh state.
Caution Callout: Executing this advanced step will permanently and irreversibly erase critical connectivity data from your device. While it will never touch your personal photographs, text messages, or installed applications, it will definitively wipe every saved Wi-Fi password, delete all paired Bluetooth devices including smartwatches and wireless earbuds, and reset all custom cellular data preferences. You must ensure you have your primary home Wi-Fi password written down or accessible before proceeding.
To perform this reset on a Stock Android device, open the Settings application and scroll to the very bottom to select System. Tap on Reset options. Select the option explicitly labeled Reset Wi-Fi, mobile and Bluetooth. Confirm your decision by tapping the Reset settings button and entering your device lock screen PIN. The smartphone will take a few moments to flush the corrupted data and restart the internal wireless modems.
On a Samsung One UI device, open the Settings application and scroll down to General management. Tap on Reset at the bottom of the menu. Select Reset network settings from the available options. Review the warning prompt detailing the specific data that will be cleared, tap Reset settings, and authenticate with your biometrics or PIN code. Once the reset is finalized, navigate back to your main Wi-Fi menu, select your home network, and enter your password to establish a completely uncorrupted, cleanly routed connection to the internet.
Frequently Asked Questions
Why does the Wi-Fi symbol in my status bar show a small exclamation mark or an X?
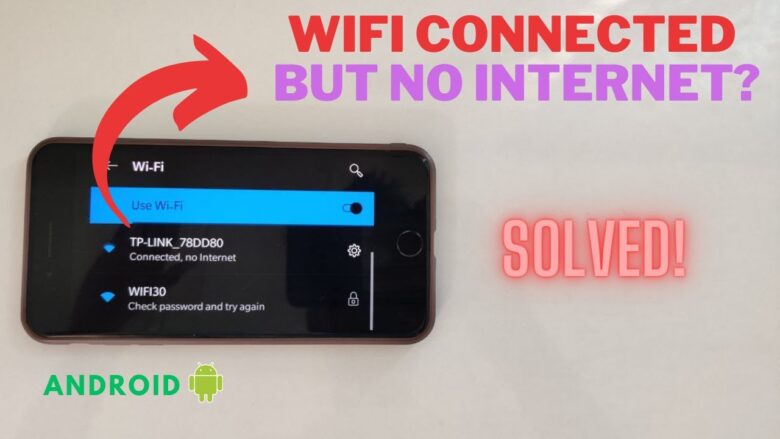
The Android operating system actively tests for internet connectivity immediately upon joining a Wi-Fi network. It does this by sending a tiny, invisible ping request to a specific Google server, typically generating a “204 No Content” response. If the router connects your phone locally but blocks this outbound ping from reaching the Google server, the operating system instantly flags the network as broken. The exclamation mark or small X overlay directly on the Wi-Fi icon is Android’s visual indicator that the localized handshake succeeded but the wide area network routing has completely failed.
Can an incorrect system date and time cause a no internet error?
Yes, a severely desynchronized system clock is a very common but frequently overlooked cause of internet routing failures. The entire modern internet relies on Secure Sockets Layer certificates to encrypt data between your smartphone and external web servers. These security certificates possess strict, time-based expiration dates. If your Android smartphone’s internal clock is manually set to a date weeks or months in the past, every single secure handshake will instantly fail validation, causing the operating system to forcefully drop the connection and report a lack of internet access. Setting your time configuration back to automatic network sync immediately resolves this conflict.
Does a merged dual-band wireless network cause connection instability?
Many modern home routers utilize a feature known as band steering, which merges the 2.4GHz and 5GHz wireless bands under a single network name. The router actively attempts to force your smartphone onto the faster 5GHz band when you are close, and the longer-range 2.4GHz band when you walk away. Older Android devices, or smartphones with poorly optimized modem firmware, frequently fail to handle this aggressive, forced handover smoothly. The smartphone gets trapped in an intermediate state where it remains authenticated to the router but drops all data packet routing, resulting in a connected but no internet state. Separating the two bands into distinct names in your router’s administrator panel prevents this hardware confusion.
Implementing these diagnostic steps systematically ensures that you isolate the exact layer of failure, whether it resides in crashed local domain name servers, aggressive privacy randomization blocking authentication, or deeply corrupted operating system network caches. By understanding how the Android kernel negotiates routing requests with external routing hardware, you can permanently eliminate gateway availability errors and maintain stable, uninterrupted connectivity across all your wireless environments.