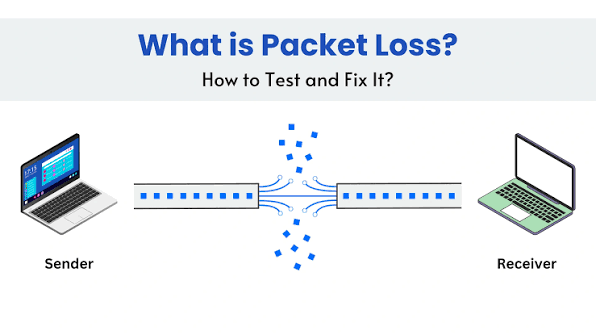
High ping and packet loss are critical network failures that completely destroy the synchronization required for real-time online activities. Whether you are executing a precision strike in a competitive multiplayer game, presenting a crucial screen share during a professional video conference, or attempting to lock in a split-second cryptocurrency spot trade on a platform like Binance, a delay in your network ruins the execution. Ping, measured in milliseconds, represents the exact physical time it takes for a data packet to travel from your computer to the host server and return. Packet loss occurs when those tiny bundles of data completely fail to reach their destination, forcing the server to awkwardly guess what happened or aggressively pause the connection until the data is resent. Resolving these issues requires diagnosing the physical connection pathway, optimizing the routing protocols, and forcefully prioritizing your latency-sensitive traffic over general background downloads.
Switch from Wi-Fi to a Hardwired Ethernet Connection
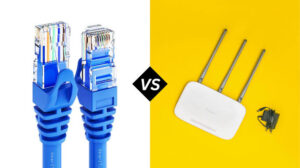
The absolute most effective method for instantly dropping your ping and eliminating packet loss is entirely abandoning your wireless connection. Wi-Fi operates via radio waves, making it highly susceptible to physical degradation from brick walls, metal appliances, and competing signals from your neighbors’ dual-band routers. When a radio wave is interrupted by interference, the data packet drops, creating an immediate latency spike.
To permanently bypass this radio interference, you must physically bridge the gap between your workstation and your modem using a high-quality Cat6 or Cat6e ethernet cable. Ethernet cables transfer data through insulated copper wiring, shielding the data packets from atmospheric interference and guaranteeing a direct, uninterrupted path to the router’s processing chip. If your computer is located multiple rooms away from the central router and running a massive cable is physically impossible, utilizing a Powerline Ethernet Adapter kit is the next best solution. These adapters plug directly into your standard wall outlets, utilizing your home’s existing electrical copper wiring to transmit the internet signal directly to your machine, providing significantly higher stability than any wireless broadcast.
Configure Quality of Service Settings on Your Router
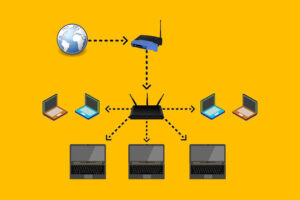
Modern households are heavily congested with dozens of smart devices silently competing for the exact same pool of internet bandwidth. If another user on your network initiates a massive 4K video stream or a cloud backup sync while you are attempting to game or host a video call, the router’s processing queue becomes instantly flooded, delaying your critical traffic. Quality of Service, commonly referred to as QoS, is a router-level traffic management system that forces the hardware to prioritize specific types of data packets over everything else.
To activate this feature, open your web browser and type your router’s default gateway IP address, which is typically 192.168.1.1 or 192.168.0.1, into the URL bar. Log in using the administrator credentials printed on the physical sticker underneath the router. Navigate through the advanced settings menu until you locate the QoS or Bandwidth Prioritization tab. Enable the feature and manually input your total internet plan upload and download speeds to calibrate the management engine. Next, add a strict priority rule specifically targeting your gaming console’s IP address or the specific port numbers utilized by your video conferencing software. Once saved, the router will aggressively pause background downloads and buffer Netflix streams slightly longer to ensure your gaming and communication packets are instantly processed and routed without delay.
Change the Default Domain Name System Servers
The Domain Name System acts as the localized phonebook of the internet, actively translating human-readable website names and game server addresses into the raw numerical IP strings required for routing. By default, your internet service provider forces your router to use their own localized DNS servers. These default ISP servers are notoriously slow, underfunded, and frequently buckle under heavy regional loads, adding precious milliseconds to every single connection handshake your computer attempts to make.
You can manually bypass these sluggish servers by forcing your network adapter to route traffic through highly optimized, enterprise-grade public resolvers. Open your Windows Control Panel, navigate to Network and Sharing Center, and select your active internet connection. Click on Properties, highlight Internet Protocol Version 4, and click Properties again. Select the option to manually enter DNS server addresses. Input 1.1.1.1 as your preferred server and 1.0.0.1 as your alternate server to utilize Cloudflare’s incredibly fast privacy-focused routing. Alternatively, you can input 8.8.8.8 and 8.8.4.4 to utilize Google’s massively redundant public DNS network. Click OK to apply the settings, instantly streamlining how your machine locates and connects to external gaming servers.
Flush the DNS Cache and Reset the Network Stack
Even if you have hardwired your connection and updated your DNS servers, the internal networking architecture of your operating system may still be actively routing traffic through corrupted, outdated pathways stored in the background cache. When your computer attempts to utilize a cached routing table that points to an old, deactivated server node, the packet gets lost in transit, resulting in severe packet loss and rubber-banding during gameplay.
You must manually force the operating system to dump these corrupted files and rebuild the network stack from a completely fresh state. Click the Windows Start menu, type Command Prompt, right-click the application, and strictly select Run as Administrator. Inside the black terminal window, type “ipconfig /flushdns” and press Enter to instantly wipe the corrupted domain cache. Next, type “netsh winsock reset” and press Enter to clear the Windows Sockets API registry, removing any lingering conflicts caused by background VPN software or proxy settings. Finally, restart your entire computer. Upon rebooting, the operating system will negotiate a completely clean IP lease with the router, ensuring your packets travel along the most efficient, updated route possible.
Close Background Bandwidth Hogs and Cloud Syncs
High ping is frequently self-inflicted by background applications silently hijacking your upload bandwidth while you are completely unaware. Cloud storage platforms like Microsoft OneDrive, Google Drive, and Dropbox are designed to aggressively seize all available network resources the moment they detect a modified file, uploading the changes to the cloud as fast as mathematically possible. Because most residential internet plans feature incredibly asymmetrical speeds with very limited upload capacity, a single background file sync will completely choke the outbound network pipeline, causing your outgoing gaming inputs or video webcam feed to stagger and fail.
Before launching any latency-sensitive application, you must systematically audit and suspend these background hogs. Open your system tray in the bottom right corner of the Windows taskbar and locate the cloud storage icons. Right-click each one and select the option to explicitly pause syncing for at least two hours. Additionally, open the Windows Settings application, navigate to Windows Update, and select the option to pause all updates for seven days. This guarantees that the Microsoft Delivery Optimization service will not secretly initiate a massive gigabyte download in the background while you are actively engaged in a competitive match or critical remote meeting.